How To Animate Cover Stills With Seedance 2.5 Audio
Square album sleeves and bold Brat-style title cards look finished as static PNGs, yet release calendars almost always demand a moving canvas within the same afternoon. Turning a flat cover graphic or an artist portrait into a looping vertical or widescreen teaser is where seedance 2.5 fits a visual designer’s release kit, provided you lock the source crop and separate background motion from static sleeve typography before hitting generate.
Most cover animations fall apart for a simple reason: designers upload a finished square sleeve covered in tiny tracklist lettering and ask a video model to add dramatic camera movement. Three seconds into the render, the border warps, the title font melts into neon smudges, and the aspect ratio crops off the artist’s chin. Treating the cover animation as a controlled first-frame job—where the artwork anchors the composition, the prompt moves only one visual layer, and crisp typography goes back on top in the final edit—turns a frustrating afternoon of wasted renders into a repeatable release routine.
What The Workbench Expects From A Static Cover File
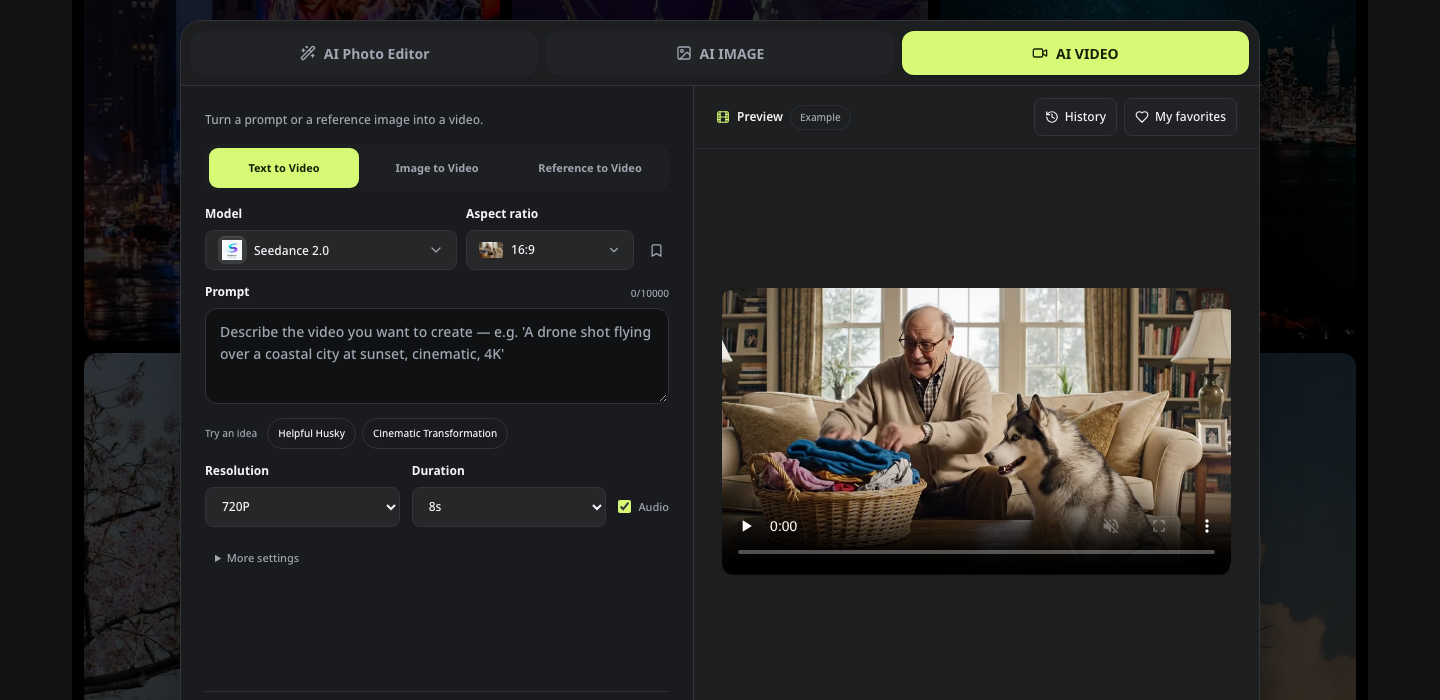
SeedVideo runs as an independent platform offering access to ByteDance’s Seedance 2.5 model without any corporate affiliation with ByteDance. Inside the generator, the top bar splits creation into three distinct paths: Text to Video, Image to Video, and Reference. Because these three modes cannot be combined inside a single request, the first decision a designer makes is choosing which door matches the assets sitting on the desktop.
When you are exploring a mood board before the cover shoot has even happened, Text to Video lets you test lighting and camera movement from plain description alone. Once an artist or label has approved a specific sleeve layout, portrait, or color field, Image to Video becomes the primary path because it locks your uploaded artwork as the exact visual starting point. If the brief requires combining multiple style frames, a choreographed camera reference, and an audio stem at the same time, switching over to Reference mode opens a multi-asset workspace built for cross-modal direction.
Prepare Your Sleeve Crop And Audio Stem Before Uploading
Before dragging a file into the browser, check how the generator handles frame geometry. In Image to Video mode, the aspect ratio control defaults to auto and inherits the proportions of your uploaded source image. If you drop a 1:1 square album cover into the slot expecting a 9:16 vertical social canvas, the output will stay square. Crop your background plate or portrait to the exact vertical, square, or widescreen frame your release platform requires before you upload it, whereas Text to Video and Reference modes let you pick a selectable ratio directly on the form.
File hygiene also saves hours of cleanup later. The uploader accepts JPG, PNG, WEBP, and GIF files up to 30 MB, and it gives you a First frame slot alongside an optional Add end frame control. Export a clean version of your cover artwork without small release dates, barcode boxes, or distributor logos baked into the image. Leaving open breathing room around the central subject lets the model animate smoke, fabric, or light across the canvas while your graphic editor holds the sharp Brat-style lettering on a separate layer for final assembly.
Three Workbench Steps From Static Artwork To Moving Loop
Running a cover animation on SeedVideo follows a three-step sequence inside the generator panel. Whether you are building a four-second loop for a streaming canvas or a thirty-second visual teaser for a single launch, keeping each step disciplined stops the model from inventing objects that clash with the artwork.
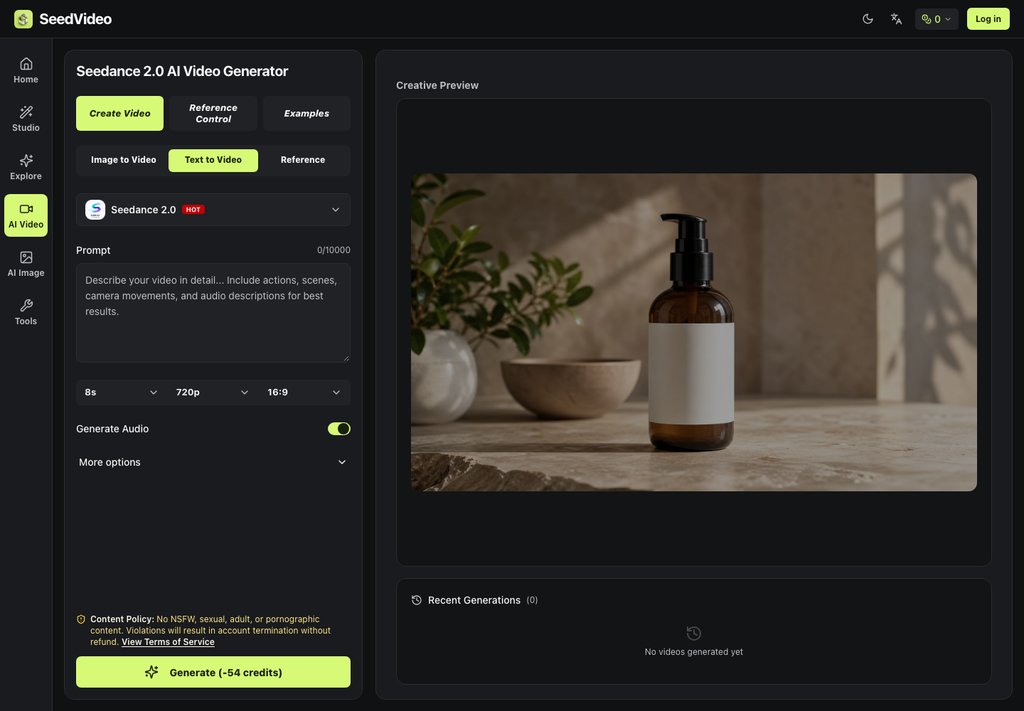
Work through the setup in the same order the interface presents the controls, starting with the input mode, moving to a single-action scene brief, and finishing with the output quality and credit quote check.
Step One Select Image Or Reference Mode Without Mixing Them
Click Image to Video when a single cover image is driving the piece, and drop your clean JPG or PNG into the First frame box. If the visual needs to land on a specific final pose—such as a performer looking up at the camera on the last beat or a studio light dimming to black—upload that target still into Add end frame so the trajectory has both a starting anchor and a destination.
When a single frame cannot express both the look and the rhythm of the promo, select Reference mode instead. The reference workflow accepts up to fifty uploads in total across three media types: up to thirty images, up to ten video clips, and up to ten audio files. Combined reference videos carry a thirty-second total limit, and combined audio references also cap at thirty seconds. Explain in your prompt whether each uploaded file governs appearance, camera movement, composition, or sound, and remove any extra mood-board images whose lighting contradicts the main cover color.
Step Two Write One Coherent Move Inside The Prompt Cap
Although the prompt box displays a 0 / 20480 character counter, a cover loop responds best to a tight brief with a clear beginning and end. State the main action first, then name what must remain untouched. The two published 720P ten-second showcase clips on the seedance 2.5 page illustrate how clean that instruction should look in practice.
In the Text to Video coastal arch sample—rendered at 720P, 10s, 16:9, with audio on and no image input—the prompt asks for one continuous aerial glide above turquoise water toward a sea arch at sunrise, explicitly excluding music, speech, people, boats, text, and logos. In the Image to Video Gongfu Tea sample—rendered at 720P, 10s, auto ratio, with audio on—the prompt locks the supplied first-frame image as the exact starting point, asks for a slow push-in as hands lift a white porcelain gaiwan lid and pour golden tea, and instructs the model to preserve the original tea set, hand anatomy, tray arrangement, and warm color palette. Apply that exact split to cover art: tell the camera to push in slowly while mist or fabric moves, and instruct the generator to preserve the portrait face, jacket texture, and background color field.
Step Three Set Duration Quality And Check The Credit Quote
Once the starting frame and prompt are in place, configure Output Quality, Duration, and Generate Audio before submitting the job. You can set an explicit clip length anywhere from four to thirty seconds, or choose automatic duration where available. Leaving duration on automatic reserves credits for up to thirty seconds of output and returns whatever unused credits remain once the finished clip length is measured. On a tight release budget, picking an explicit four-second or ten-second duration keeps your credit reservation predictable from the start.
You do not need a VIP subscription to run the model; you only need an account balance that covers the credit quote printed on the generate button, such as the -315 credits estimate shown on the workspace preview. Note that attaching a reference video adds the reference video’s duration to the credit calculation alongside your output seconds.
Draft At Lower Resolution Before Rendering The Final Master
The current SeedVideo output controls export in MP4 or MOV format at 480p, 720p, or 1080p. Because per-second credit usage steps up with resolution—starting from a published floor of 17 credits per second at 480p with a reference video or 28 without one, moving to 38 or 63 at 720p, and reaching 95 or 158 at 1080p—smart designers test their camera speed at 480p or 720p first.
Watch the draft loop from first frame to last to see whether the silhouette holds together and the camera pace feels believable. Only after the motion passes review on a laptop screen should you switch Output Quality to 1080p for the final release master.
Audit Native Audio Against Your Track Snippet
Turning on Generate Audio allows the model to build native room tone, weather atmosphere, or subtle movement sounds in the same pass as the picture. That built-in sound bed works well when an artist wants a five-second atmospheric intro before the beat drops on a social reel.
If the clip will sit underneath a mastered vocal hook, review the generated audio alongside the picture before exporting. Whenever ambient effects compete with the snare or spoken lyric, either strip the generated audio track inside your editing timeline or upload the exact thirty-second musical cue in Reference mode so the visual motion rides the real beat.
Common Cover Animation Mistakes That Ruin Sleeve Typography
Because generative video results vary between runs, changing five prompt lines at once after a bad draft makes it impossible to tell which instruction broke the image. When a cover loop comes back looking warped, check the draft against these four frequent setup mistakes and adjust only one variable on the next pass:
- Uploading An Uncropped Square For A Vertical Reel: Remember that Image to Video follows the source file’s aspect ratio automatically, so pre-crop your artwork to 9:16 or 16:9 before uploading rather than expecting the prompt to reframe the canvas.
- Leaving Small Tracklist Text Inside The First Frame: Fine lettering on a sleeve often shimmers when the camera moves; feed the generator the clean background art and overlay crisp Brat typography, release dates, and logos in your editing software afterward.
- Packing Competing Camera Directions Into One Prompt: Asking for an orbit, a zoom, and a lighting change inside a six-second window causes faces and packaging to drift; reduce the prompt to one camera move and one environmental motion.
- Stacking Conflicting Outfits In Reference Mode: Uploading fifty reference files just because the ceiling allows fifty confuses the palette; keep only coherent references you have permission to use and state each file’s role clearly.
Save the version that holds the subject steady and write down the exact prompt tweak that solved the drift so the next single in the campaign starts from a proven recipe.
Overlay Crisp Release Text After The Motion Pass Finishes
Animating an album cover does not require rebuilding the artwork from scratch. SeedVideo gives designers a direct path from a static sleeve or multi-file reference folder to a watermark-free MP4 or MOV clip, with live credit quotes and selectable durations from four to thirty seconds before any credits leave the account.
Let the generator handle what static design software cannot—slow camera push-ins, drifting mist, subtle portrait movement, and atmospheric sound—and bring the exported 1080p file back into your layout editor to place the final title card on top. That division of labor keeps the motion lively and the release typography razor-sharp.