How to Install Codex CLI in 2026 (npm, Homebrew, Script)
A codex cli install should take under five minutes but one specific mistake sends a surprising number of people down a confusing detour: running “npm i -g codex” instead of the correctly scoped package name. That single missing scope installs an unrelated tool from 2012 instead of OpenAI’s Codex CLI, with no error to warn you.
This guide walks through every supported install method (the official script, npm and Homebrew) across macOS, Linux, Windows and WSL2, plus the two specific mistakes that account for most install failures reported against this tool.
What Codex CLI Is and What This Install Guide Covers
Codex CLI is OpenAI’s command-line coding agent, run directly from a terminal rather than inside a chat window or an editor plugin. It reads a project’s files, proposes and applies code changes and can run commands on your behalf depending on the approval mode you choose.
This codex cli install guide covers the three official install paths OpenAI documents: a one-line install script, npm and Homebrew, plus the platform differences between macOS, Linux, Windows and WSL2 that change which of those three makes sense.
If you have not settled on Codex CLI specifically yet, our roundup of AI coding assistants compares it against the other major options before you commit to installing one.
What You Need Before You Start
A ChatGPT Plus, Pro, Business, Edu or Enterprise plan covers authentication for most users, since Codex CLI signs in with your existing ChatGPT account by default. An OpenAI API key works as an alternative, though it requires a short extra configuration step after install.
If you plan to install via npm rather than the script or Homebrew, you need Node.js installed first, commonly recommended at version 22 or later for this tool. The script-based and Homebrew installs skip this requirement entirely, since both ship a compiled binary rather than relying on Node.
Installing Codex CLI on macOS
Homebrew is the path OpenAI’s own documentation recommends for macOS, largely because it handles future updates through a single, familiar command rather than requiring you to remember which script or package manager you used originally.
- Homebrew (recommended): brew install –cask codex
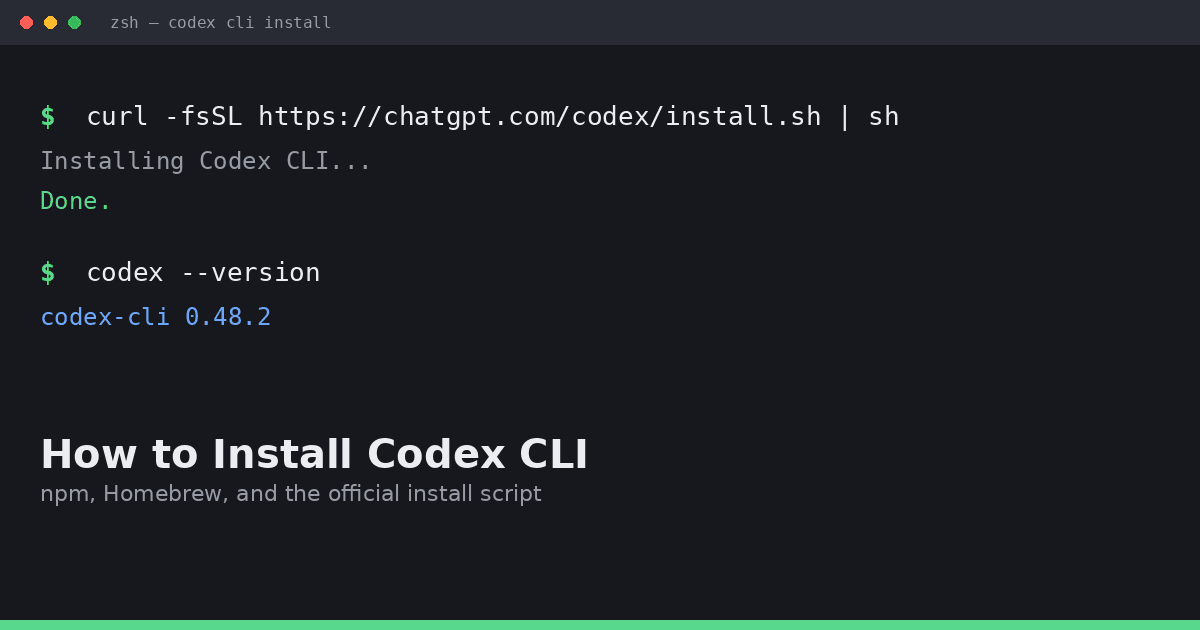
- Install script: curl -fsSL https://chatgpt.com/codex/install.sh | sh
- npm (requires Node.js 22+): npm install -g @openai/codex
Installing Codex CLI on Linux
Linux distributions vary enough in package manager conventions that OpenAI ships the install script as the primary recommended path rather than a distribution-specific package, which also avoids pulling in a full Node.js toolchain if you only need the CLI itself.
- Install script (recommended): curl -fsSL https://chatgpt.com/codex/install.sh | sh
- npm (requires Node.js 22+): npm install -g @openai/codex
Installing Codex CLI on Windows and WSL2
Codex CLI runs natively in PowerShell on Windows, so WSL2 is optional rather than required. Choosing WSL2 mainly makes sense if the rest of your development workflow, your shell scripts, your other CLI tools, already lives inside a Linux environment and you would rather keep Codex CLI consistent with that setup than run it natively in PowerShell.
- Microsoft Store: winget install Codex -s msstore
- PowerShell script: powershell -ExecutionPolicy ByPass -c “irm https://chatgpt.com/codex/install.ps1 | iex”
- WSL2: follow the Linux install script inside your WSL2 distribution for a Linux-native environment
The npm Mistake That Installs the Wrong Package Entirely
The single most common codex cli install mistake is running “npm i -g codex” without the scope. That command installs a completely unrelated package, a documentation generator published under the bare name “codex” back in 2012, with no warning that it is not OpenAI’s tool.
The correct command always includes the scope: npm install -g @openai/codex. This confusion is not entirely the user’s fault either, Codex CLI has at times printed the wrong, unscoped upgrade command from inside its own interface, which sends even existing users toward the wrong package when they try to update.
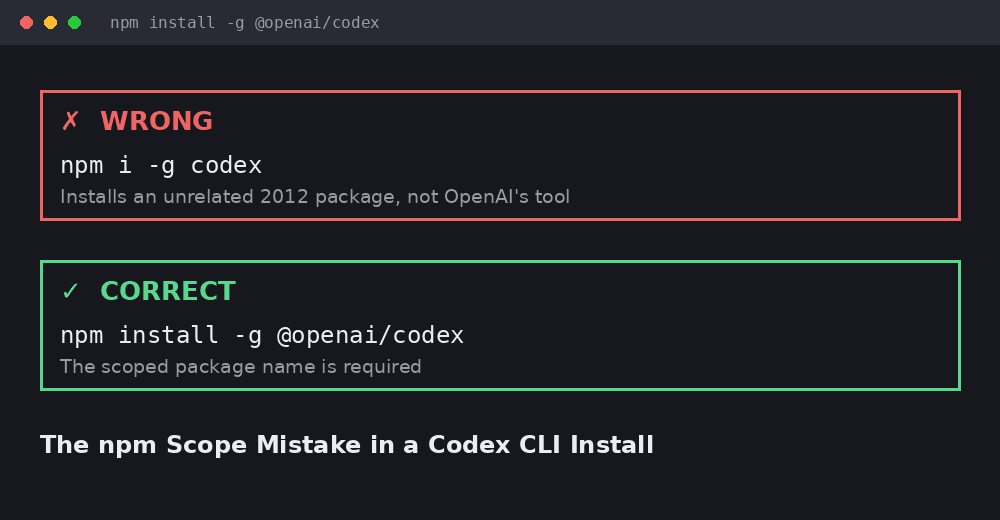
The scoped @openai/codex package name is required for a correct codex cli install via npm.
Installing Codex CLI With npm the Correct Way
With Node.js 22 or later installed and verified (node –version), run npm install -g @openai/codex exactly as written, including the @openai/ scope. Skipping global installation (the -g flag) also causes confusion later, since the codex command will not be available from an arbitrary terminal location without it.
npm remains a reasonable choice if your workflow already manages other CLI tools through npm and you want Codex CLI to fit that same update pattern but for most individual users, the install script or Homebrew avoids the Node version dependency entirely.
Signing In After Installation
Run codex from any terminal after installation finishes. The first run prompts you to sign in and selecting “Sign in with ChatGPT” is the path OpenAI recommends for anyone on a Plus, Pro, Business, Edu or Enterprise plan.
An API key works as an alternative authentication method and is generally the better fit for automated or headless environments, though it requires generating and configuring that key separately from a standard ChatGPT login.
Verifying the Install Worked
Run codex –version from a fresh terminal window once installation and sign-in are complete. A version number confirms the install succeeded and that your system’s PATH correctly points at the new binary rather than at a stale or conflicting entry.
If the command is not found at all, closing and reopening your terminal fixes this more often than any other single step, since PATH changes from a fresh install do not always apply to a terminal session that was already open before you started.
The Homebrew Formula-to-Cask Upgrade Problem
Codex CLI’s Homebrew distribution moved from a formula to a cask at some point after its initial release, which a GitHub issue on the openai/codex repository documents in detail. Anyone who installed before that switch and later runs “brew upgrade codex” gets an error stating the cask is not installed, since Homebrew now looks for a cask where a formula used to exist.
The fix is a two-step replacement rather than a simple retry: brew uninstall codex –formula, followed by brew install codex –cask. Codex CLI’s own in-app upgrade prompt was not updated to reflect this change at the time the issue was filed, so the tool itself can point affected users toward a command that fails.
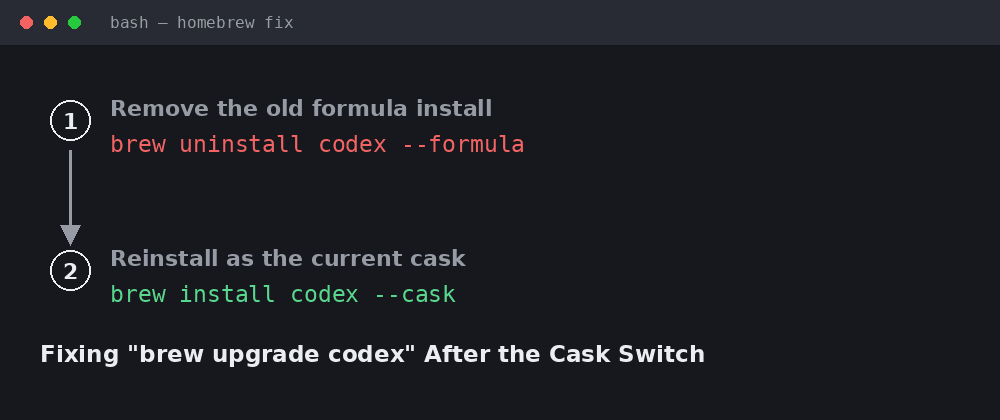
Fixing a broken “brew upgrade codex” after the formula-to-cask switch.
Updating Codex CLI to the Latest Version
For an install done via the official script, rerunning the same install command updates Codex CLI to the latest version rather than requiring a separate update command. For a Homebrew cask install, brew upgrade –cask codex is the correct ongoing command once you have completed the formula-to-cask fix above if it applies to you.
For an npm install, npm install -g @openai/codex again pulls the latest published version, the same scoped command used for the original install.
Choosing Between the Three Official Install Methods
All three official paths (the install script, npm and Homebrew) end up installing the same underlying tool, so the choice mostly comes down to how you want updates handled rather than any difference in the finished CLI itself. The install script is the fastest single command on a fresh machine with no other requirements to think about first.
Homebrew suits anyone already managing other command-line tools through brew, since codex cli install and update commands then follow the same pattern as everything else on the system. npm only makes sense if Node.js 22 or later is already part of your setup for other reasons, since installing Node solely to run this one command is more overhead than either of the other two paths.
Whichever codex cli install method you pick, the end result is identical: the same codex binary, the same sign-in flow and the same command set, so switching methods later if your setup changes carries no real downside.
Running Codex CLI Inside a Docker Container
A containerized codex cli install typically uses the npm path inside a Node-based image, since a Dockerfile can pin an exact Node version and install the scoped @openai/codex package as one RUN step without needing an interactive shell at build time.
API key authentication is the practical choice inside a container, combined with the same CODEX_NON_INTERACTIVE=1 environment variable used for other automated deployments, since a container has no browser available to complete a ChatGPT sign-in flow.
Installing Codex CLI for Unattended or Scripted Environments
For CI pipelines, containers or any automated deployment where an interactive prompt would hang the process, set the CODEX_NON_INTERACTIVE=1 environment variable before running the install script. This skips the interactive steps that assume a human is watching the terminal.
Combine this with API key authentication rather than a ChatGPT login for a fully unattended setup, since a browser-based sign-in flow has no path to complete inside a headless environment.
Troubleshooting Common Install Failures
A “command not found” error after what looked like a successful install is almost always a PATH issue, closing and reopening your terminal resolves this more often than reinstalling. A version mismatch or unexpected behavior after installing frequently traces back to the npm scope mistake described above, running which codex or where codex (on Windows) shows you exactly which binary your system is actually running.
Missing Node.js or Python dependencies block the npm install path specifically, not the script or Homebrew paths, so switching install methods is often a faster fix than troubleshooting a missing dependency if you do not already rely on Node.js for other tools.
A permissions error during a global npm install, rather than a missing-package error, usually means npm’s global directory is not writable by your current user. Reinstalling with the official script or Homebrew sidesteps this entirely, since neither path depends on npm’s global install location at all.
FAQs
What is the fastest codex cli install method overall?
The one-line install script is the fastest path on a fresh machine, since it requires no prior Node.js setup and finishes in a single command on macOS, Linux and Windows.
What is the correct command for a codex cli install with npm?
npm install -g @openai/codex, including the @openai/ scope. Running npm i -g codex without the scope installs an unrelated, unofficial package instead of OpenAI’s tool.
Do I need Node.js to install Codex CLI?
Only if you install via npm, where Node.js 22 or later is commonly recommended. The official install script and the Homebrew cask both ship a compiled binary and do not require Node.js at all.
Why does brew upgrade codex fail with a cask error?
Codex CLI’s Homebrew distribution switched from a formula to a cask after its initial release. Anyone who installed before that switch needs to run brew uninstall codex –formula followed by brew install codex –cask rather than a plain upgrade.
Does Codex CLI run natively on Windows or do I need WSL2?
It runs natively in PowerShell on Windows. WSL2 is optional and mainly useful if the rest of your development workflow already runs inside a Linux environment.
How do I verify a codex cli install actually worked?
Open a fresh terminal window and run codex –version. A returned version number confirms the install succeeded and your PATH is pointing at the correct binary.
Can I install Codex CLI without signing in interactively?
Yes, for automated environments set CODEX_NON_INTERACTIVE=1 before running the install script and use API key authentication instead of a ChatGPT login, since an interactive browser sign-in cannot complete in a headless environment.
Conclusion
A codex cli install goes smoothly on any of the three official paths as long as you avoid the two specific traps covered here: the unscoped npm package name and the Homebrew formula-to-cask upgrade failure for anyone who installed before that switch happened. For most individual users, the install script or Homebrew cask sidesteps the Node.js dependency entirely and is the simpler starting point.
If you are still deciding whether Codex CLI is the right coding agent for your workflow in the first place, our AI coding assistants roundup compares it against the alternatives and BratGen’s homepage also has free generators worth a look once your setup is sorted.